Markdown写作自动上传图片至Github - Typora编辑器 + PicGo河床
使用Typora+PicGo可以在Markdown写作过程中非常方便快速地插入图片。
一、下载并设置PicGo
下载地址:https://github.com/Molunerfinn/PicGo/releases
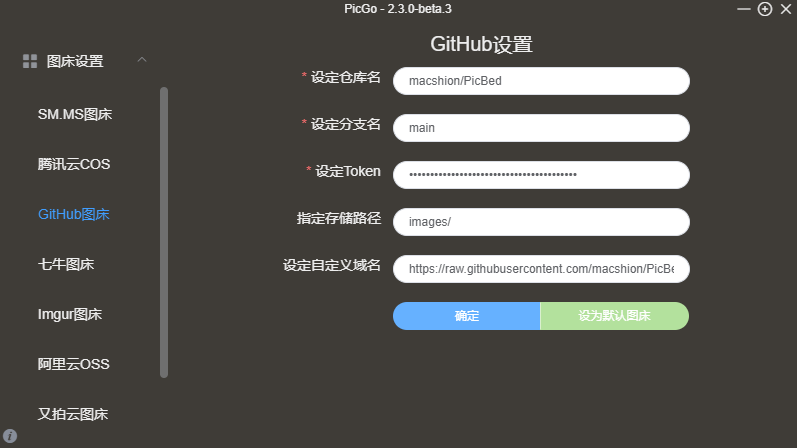
设置PicGo,支持多个图床,我这里用Github:

仓库名:Github用户名/Repo名
分支:一般为master或者main
指定存储路径:可不填,如果指定路径后上传失败,需要亲手创建文件夹
设定自定义域名:参考设置 https://raw.githubusercontent.com/macshion/PicBed/main
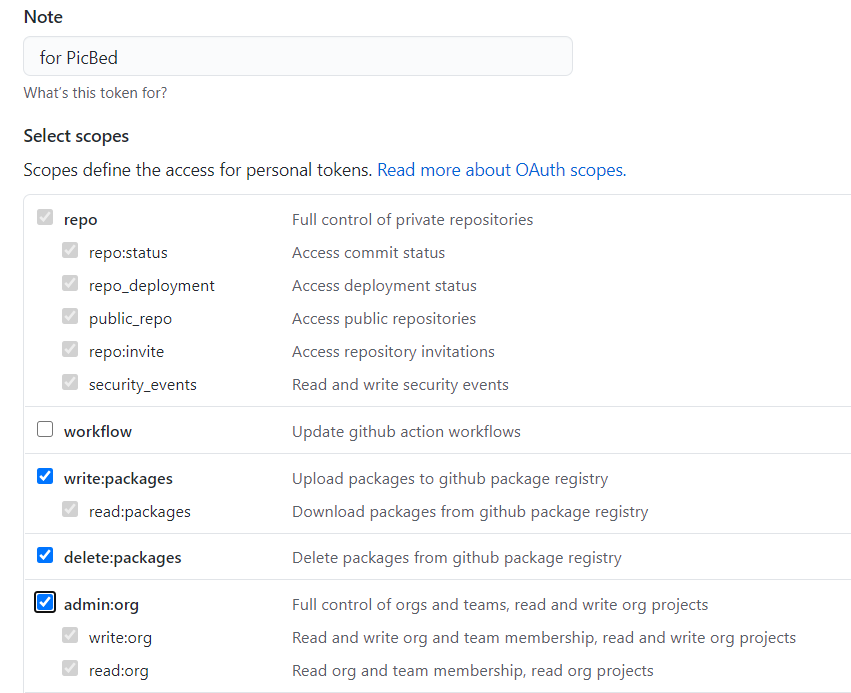
Token: 获取Github Token方法如下:
1、点击Github头像,选择 “setting”, 点击左侧菜单进入 “Developer settings”,然后进入 “Personal access tokens”,在页面右上角点击 “Generate new token” 。
 2、新建Token,勾选权限,生成Token后需复制保存好,未保存好以后要用只能重新生成。

二、下载并设置Typora
从官网下载Typora:https://typora.io
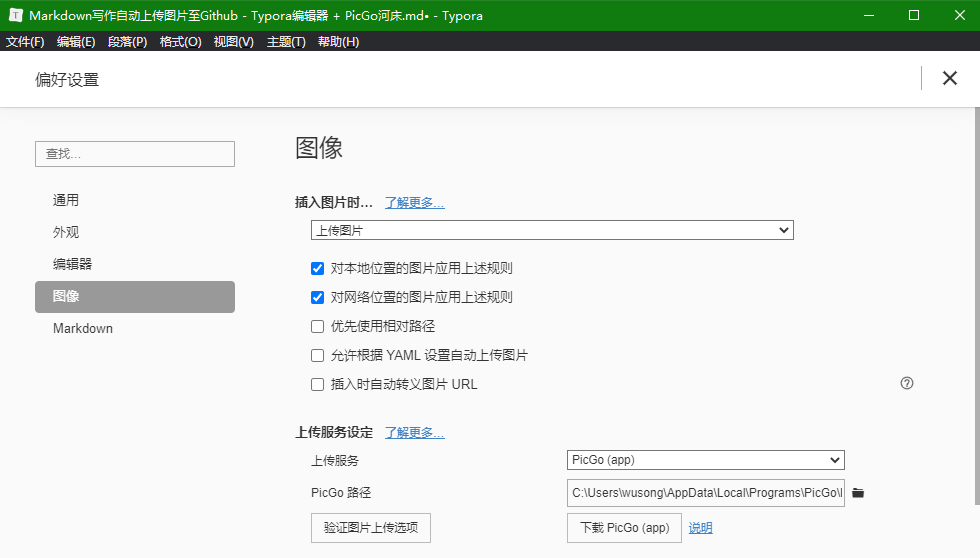
打开Typora,进入“文件 - 偏好设置” 设置通过PicGo自动上传图片。
